

Reflector photography is a critical technique for anyone who wants to make beautiful pictures without access to a professional photo studio. With a reflector light, a photographer can adjust the existing light flow to improve shadows or emphasize certain parts of the subject. Being familiar with this aspect of lighting totally transforms the atmosphere of your photos. Whether you use natural or lamp lighting, these are great tools for taking photos of a professional quality.
Reflector photography relies on the simple physics of reflection to improve image quality. Instead of adding more bulbs, a person uses a surface to catch and move the light that is already there. This method is popular because it is portable and very easy to set up in any location.
These surfaces help manage how the sun or a flash hits the subject. Most people start with a basic five-in-one kit because it offers the most variety for different weather conditions.
A light reflector is often more useful than a second flash. It does not require batteries or cables, making it a reliable choice for outdoor sessions. Using this tool helps balance the exposure between a bright background and a dark subject.
The primary goal is to make the lighting look natural rather than manufactured. By placing the tool at the right angle, a person can mimic the look of expensive professional gear.
To bounce light correctly, one must consider the angle of the main light source. If the sun is high, the board should be held low to reflect light upward into the face. This fills in the dark areas under the chin and nose.
Moving the tool closer to the person makes the light stronger and more defined. Pulling it back creates a more subtle and spread-out glow that blends into the surroundings.
Smart reflector use involves watching the clouds and the sun's position. On a cloudy day, the white side of the tool helps add a bit of direction to the flat, gray light. On a sunny day, the silver side can act as a powerful secondary light source.
It is helpful to have an assistant or a sturdy stand to hold the equipment. Even a slight tilt can change where the brightness lands on the person being photographed.
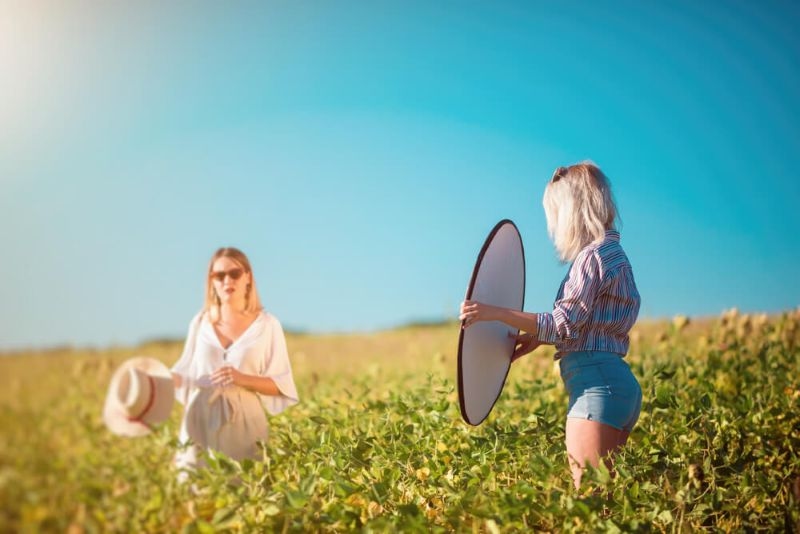
While there are many lighting tools available, the foldable disc remains a favorite for its ease of use. Different shapes, such as rectangles or ovals, provide varying coverage areas depending on the size of the subject. Large panels are great for full-body shots, while small discs work for headshots.
The gear should match the specific needs of the shoot. Most hobbyists find that a medium-sized circular disc is the most versatile option for daily practice.
Following a few reflector tips can help prevent common mistakes, such as blinding the subject or creating uneven color. Always check the reflection in the camera's viewfinder before clicking the shutter. This ensures the light is hitting the eyes perfectly to create a catchlight.
Small adjustments often lead to the biggest improvements. Sometimes, just a tiny nudge of the board makes the difference between a flat photo and one that pops.
Reflector photography can also be used indoors near windows. By placing the board opposite a window, a person can create a wraparound light effect that mimics a professional studio. This is a great way to take high-quality portraits at home with very little investment.
This technique is also helpful for still-life and product shots. It provides a bright, clean look that highlights the object's textures and colors perfectly.
Taking care of your gear ensures that the reflective surfaces stay bright and effective. Dirt or wrinkles can cause the light to scatter in ways that are hard to control. Always fold the discs carefully and store them in their protective pouches after every use.
Proper maintenance means the tools will last for years since they are often used in the dirt or grass. A quick cleaning after a shoot is a smart habit to develop.
Mastering the use of a light reflector is a game-changer for any person interested in improving their images. It provides a simple, cost-effective way to manage shadows and highlights. By practicing these techniques, a photographer gains total control over their environment. Start using these tools to see an immediate difference in quality.
During the middle of the day, when the sun is very bright, a white surface is usually the best choice. It provides a soft, neutral fill that does not look artificial. This helps to soften the very dark shadows caused by the overhead sun without adding a strange color.
Yes, this method is excellent for small objects because it helps show off textures. Using small pieces of white or silver cardstock can serve as mini-tools to bounce light into tiny crevices. This makes the product look three-dimensional and much more appealing to viewers of the photo.
The board should generally be placed on the opposite side of the main light source. If the sun is hitting the left side of a face, the tool should be on the right side. This catches the escaping light and pushes it back onto the shadowed part of the subject.
Professional instruments offer greater resistance and higher quality thanks to their unique coating material. Though any piece of white poster board may substitute for this purpose, it should be noted that the light source instrument is more portable and offers greater color variety.
This content was created by AI