

There are many great photos that are based on light. One way to enhance the quality of your photos is to use natural or studio lighting effectively. The key to capturing great photographs is understanding how light works and creating 3D qualities and mood by using proper lighting methods, appropriate lighting equipment, and softer light. A good understanding of how to use lighting for your photographs will enable beginning photographers and professionals alike to create stunning images that will help them succeed as artists.
Lighting is one of the most important aspects of photography, because it is the way in which light is used to illuminate your subject. It will play a large role in determining exposure, contrast, mood, and storytelling. Even with the best camera in the world, if you don’t have proper lighting techniques, you will be unable to produce quality images.
Light will define texture, illuminate details, and cast shadows. A properly planned lighting setup will enhance your subject, while a poorly planned one could completely flatten or distort it. For these reasons, most photographers spend significant time mastering lighting.
There are two types of light in photography:
Natural Light Photography (sunlight) and Studio Lighting (artificial sources such as flash and LEDs).
Each has its own strengths, and knowing when to use which will help in producing professional-quality images.
Many beginning photographers will focus only on buying the most expensive camera equipment. However, lighting in photography will be a more critical factor than the equipment you use when producing great images. Many smartphone images use soft light and lighting techniques to produce stunning results.
Learning how to use different types of lighting will increase the speed at which you learn how to take better photos. Knowing how to manipulate light will give you full creative control over your pictures.
Soft light creates very soft, diffused, and even light; therefore, it is great for reducing the severity of shadows. It is especially suited for portrait, product, and lifestyle photography. Soft light can be created with curtains or a diffuser, or it can occur naturally on cloudy days, providing you with natural light for photography.
Lighting techniques should always be balanced, and you should have a good lighting setup to provide highlights and shadows. Overexposed photos will result in loss of picture detail, and underexposed photos will appear dark. To maintain a balanced light source, you can use either reflectors or additional lighting.
If you regularly practice these setups, you will better understand different lighting techniques.
Both natural light and studio lighting have distinct advantages when viewed from certain perspectives. The option you select will depend on your subject, how you want to portray them (your style), and where the shoot is taking place (your environment).
The greatest advantage of natural light photography is that it is free, accessible, and adaptable. For example, natural light photography is a great choice for outdoor, portrait, and travel photography.
Advantages of using natural light include:
Using natural light can be unpredictable due to changing weather conditions and the time of day.
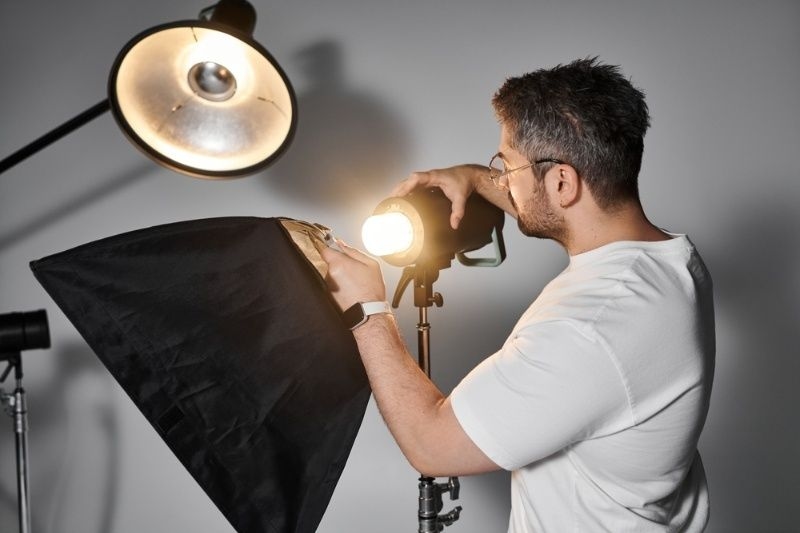
The greatest advantage of studio lighting is that it gives you full control of your shooting environment. You can adjust the intensity, direction, and color temperature of the light to achieve your desired result.
The primary benefit of utilizing studio light is the ability to control your shooting environment completely. You are in total command of the level of light, its angle, and the temperature of the light to achieve your intended outcome.
Studio Light Advantages:
Studio lighting is the best choice when accuracy and consistency of results are essential to you.
Combining studio and natural light will provide you with the best possibilities. Many photographers combine natural and studio lighting. For instance, using reflectors or flash when doing natural light photography will improve the balance of your exposure when photographing outdoors.
There are a few great practical tips for improving photographic lighting: use twilight or dawn (the golden hour) for beautiful, soft light; use reflections to control shadows; and avoid bright, harsh sunlight during the middle of the day. You can also make minor adjustments to your provided lighting during photography and experiment with various lighting styles or techniques to quickly improve your photo quality.
Take photographs at sunrise/sunset; the light will produce warm, soft colors. Using either of these two types of lighting, with no additional equipment, is really very easy. Use reflective/softening devices.
Reflecting devices will reflect some of the light back onto your subject, thereby achieving a better result than using just the direct light source. Light-diffusing devices soften the light that passes through them; as a result, your photography improves.
If you shoot outdoors during the day, avoid direct sunlight, as it creates shadows. If no shade is available, consider using reflective devices and/or softening devices to create a softer-looking light than direct sunlight alone.
Try as many different ways of experimenting as possible (with light) until you find an angle, intensity, and/or way of setting up the shot that is most effective for your style of photography.
Photography involves using proper lighting to create great images; therefore, mastering both natural and studio lighting techniques will improve the quality of your photographs.
You can use soft, directional, and balanced lighting to master lighting and create great photographs. If you learn how to effectively use lighting in photography, you will notice a significant increase in the quality of your photographs.
Beginners can easily practice lighting in photography with simple tools like lamps, windows, and reflectors. Start by capturing images with natural light near windows, then try different angles and artificial light sources to create shadows. Then practice different lighting techniques every day to learn how soft light and lighting direction affect your images.
Common lighting mistakes in photography include using direct, harsh light, ignoring shadows, and failing to plan a well-thought-out lighting setup. You can also avoid unnecessary mixing of different color temperatures. I'd like you to focus on using lighting techniques that provide a good exposure balance. To accomplish this consistently, you can use soft light and experiment with natural-light photography settings.
Lighting creates a direct impact on color accuracy and mood in photography. For example, warm lighting (like incandescent) will make reds and yellows appear more vivid, while cool lighting (like fluorescent) will make blues appear more vivid. The studio lights let you control the light's temperature. The temperature of natural daylight changes throughout the entire day. To produce consistent colors in natural lighting, you will need to adjust your camera's white balance to the correct color temperature.
No, expensive photography equipment isn't necessary to achieve quality lighting. Many professional photographers use natural light with just basic tools. The difference between good and bad photographs is in understanding how to use lighting, especially soft light, effectively. You can set up a great lighting arrangement that produces high-quality results with minimal equipment and a lot of creativity.
Choosing a proper lighting setup depends on your subject and the mood you want to capture. A portrait will typically look best with soft light, while a product shot will usually call for controlled studio lighting. Using natural light for outdoor photography creates an effective lighting setup. Testing different lighting styles will help you discover the lighting that best enhances the subject, showing its details.
This content was created by AI